Showing posts with label pastels. Show all posts

Sunday, November 16, 2014

Howard Arkley inspired Houses


Kindergarten created bright houses in the style of Australian artist, Howard Arkley. Kindy also looked at the following interactive game online: 
Howard Arkley interactive


Monday, August 19, 2013

Beautiful Butterflies

Year 2 have been developing their blending techniques with oil pastels. Oil pastels can be blended together to create a soft, smooth painted effect. 

Here are oil pastels that are not blended:

Here are oil pastels that have been blended (pressing the lightest colour on top):

Year 2 did these practice sheets first, which we cut out and framed on black card. 


 Year 2 have since used the oil pastels to create beautiful Monarch Butterflies. They blended yellow and orange together to create bright wings and combined white, light blue and dark blue to make a vibrant background. Finally the black edges were added and the result is wonderful! Well done Year 2!


The original idea for this lesson was from a fantastic website called Art For Kids Hub which has brilliant tutorials and worksheets! Check it out!

Sunday, August 18, 2013

Chicks and Chickens

K/6B have been learning about where our food comes from. They have painted lovely chickens, eggs, and baby chicks.


Grace Cossington Smith inspired Sydney Harbour Bridge

Year 5 have been studying the work of Australian Artists who have used the Sydney Harbour Bridge in their work. One artist in particular, was Grace Cossington-Smith. Year 5 looked closely at the artist's depiction of the bridge being constructed and her misty, watercolour and pastel techniques.


The Bridge in Curve, 1926.
Year 5 created their own Sydney Harbour Bridge artworks in her style. Students had to try to imagine what Sydney would have looked like in the past. 


Monday, August 12, 2013

Trees

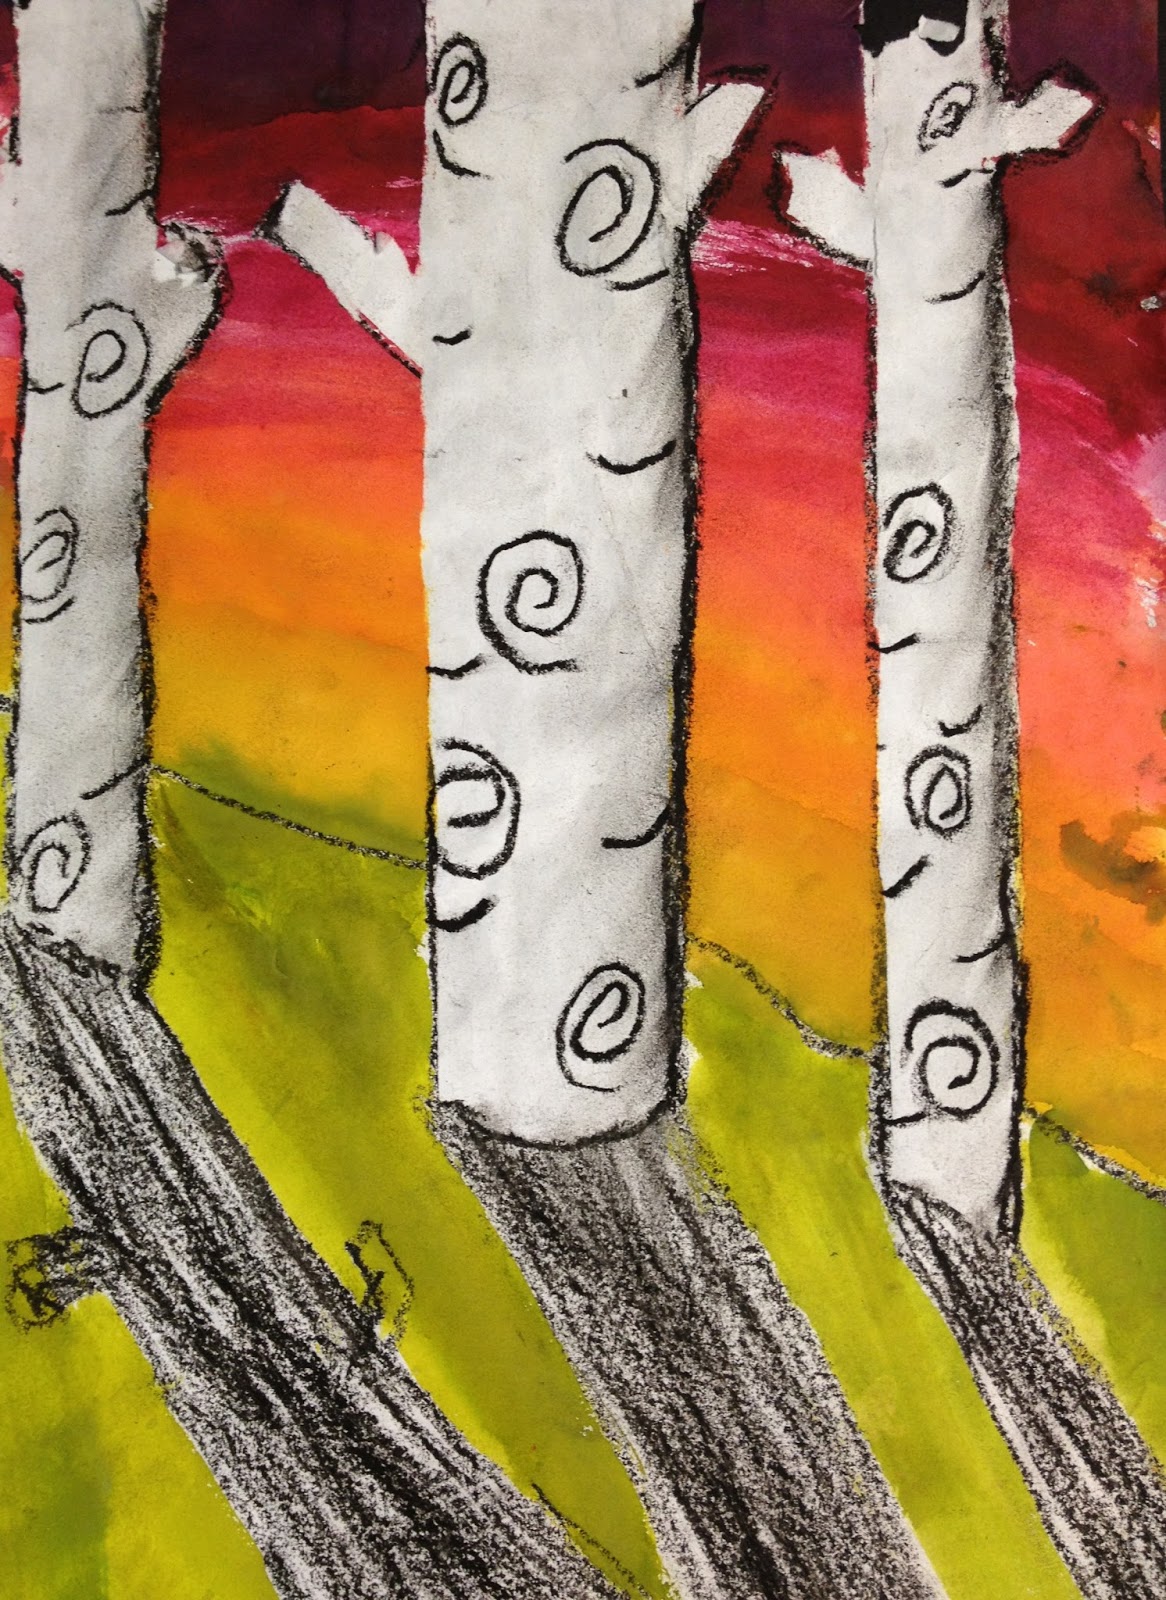
Year 3 and 4 used masking tape to create Australian Gum Trees. Students used pastels and watercolour paints to add details. The focus was on the trunks rather than the leaves to give the illusion that you were walking through the national park.

Lesson 1
1. Rip pieces of masking tape - stick on art shirt for safe keeping and to lose stickiness.
2. Place tape on art paper, starting from the top. Leave space at the bottom.
3. Add smaller pieces of tape to create branches.
4. Outline with black pastel, add shadows, add horizon.


 Lesson 2

1. Paint sky using water colours. Must blend a minimum of 3 colours together to create the look of a sunrise, sunset or bushfire.
2. Paint foreground /add any other details.
3. Allow to dry.


Lesson 3
1. CAREFULLY peel off tape, reveling gum trees underneath.
2. Smudge finger along one side of tree, dragging pastel in to create a 3D look. 
3. Add lines and knots to look like tree trunks.


They look great! Well done Year 4!